Friday, January 3, 2014

Settling in at the white house.

Here' same peek at our new Master bedroom and bathroom. It's one of the few places in the house with Sheetrock walls rather than plaster, so I was able to hang a few pictures.
A few of you asked how we're working with the big built-in desk situation in our bedroom...
I just managed to get rid of that TV, it's the kind of thing that you almost can't give away, so I was pleased that Freecycle came through for me. I have parked a few more craft items on "my side". I think I will get to use the other side too because Brian just doesn't see a use for another desk...

Random shot of the laundry. We had a hamper that I couldn't figure how to fit it, and I'm just stacking the 3 white baskets on the dryer for now. It's working for me. We think that this space will become a main floor half-bathroom and laundry will get moved back to the basement. It's a little weird for guests to use the facilities, if you know what I mean.
A couple more shots of the bedroom. I'm dreaming of better window treatments than somewhat broken shutters, but we have to get to "doing" this room before I'll tackle that.
I'm really surprised that Brian hasn't taken his paint brush into here yet?!

What do you think will come first? What would you do with this space?

Fat Biking in the OC

No, not Orange County...  We live in a different OC, and sometimes struggle to find fun things to do.  Here's a fun afternoon we had a couple weeks ago (Christmas got in the way of me putting this one up... Excuses, excuses).  For those of you who only come here for the cool DIY projects, you can take a good look at the way the sled connects to the hot guy on the orange bike - we built that, engineer style last year.  We've actually re-built that pulk a few times since.  Continually improving our design ;)  

 There's a public area that skiers often use when the snow conditions are low, but it isn't groomed, so they can't keep the fat bikes off!  We saw a skier while we were out there and his comment was 'oh, good, you're grooming it for us!'


 This is the most fun we've had in the OC for quite some time!


 I ride the cheap blue fat bike, which is why you only see pictures of my boys and the fancy orange bike.  The snow was clearly glittering that afternoon, but I don't think you can see it very well in this picture.


Noah didn't last as long as the rest of us were having fun, which perpetuated a few additional Christmas gifts for him - more warm equipment.  I'll share about keeping your preschooler warm when playing outside on cold days next time!

Monday, December 30, 2013

Another shower tile job

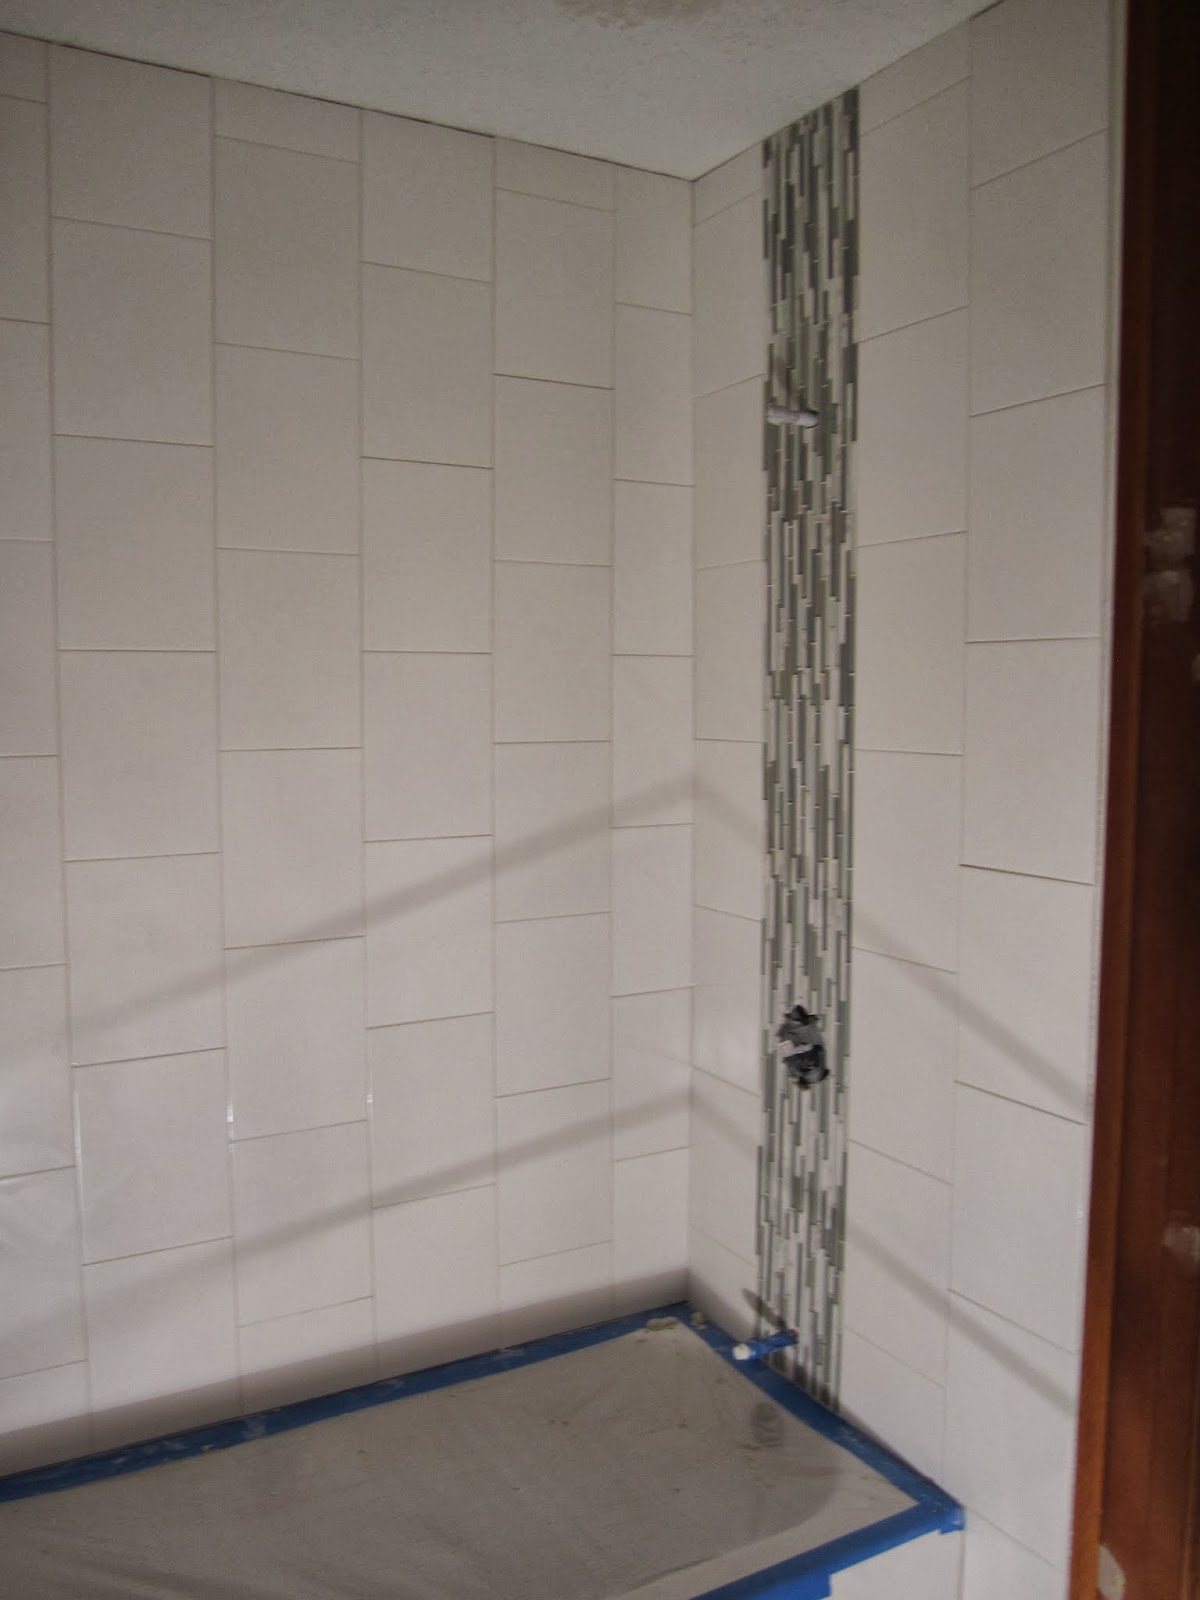
The next shower surround had a couple specific goals: larger tile (less cutting and less grout) while still keeping the bright white subway tile-like deal going; modern vibe.  I had this pin for a shower idea that I was looking at.  Here we are working on it.  We had a quick weekend of babysitting so we cruised up, tiled like mad, and made this progress.  We finished the job to the point we needed to without Noah around.

 I had the pleasure of working with this upgraded tile saw - up at standing height!  It worked great for me and helped get a much closer cut in the corners of the shower.  Can you see the loaner saw down in the corner?  I did ALL my other tile jobs so far with that little guy.

 We selected to do a glass mosaic on the end where the plumbing comes out with the thought that it would be a nice accent and much easier install with removing little tiles and cutting the back webbing, rather than trying to get a 4 inch hole in the middle of a 9x12 tile.  There were challenges with the mosaic, but overall, it was a pleasant way to approach the plumbing column.
 Mmm, pretty!
 We nearly finished the back wall and the plumbing end on day one of setting tile.  Not bad for a couple novices.
 The vertical bricking also added some new challenges - gotta make sure it goes up straight!  Please excuse the funky worklight shadows in the pictures.  We don't have any lights in this bathroom (to be installed after painting is complete) and it's in an interior area...
 
 We taped off the tub (fresh each day) to try to keep it clean from falling mud chunks.  That worked fairly well.


 Second day we finished setting the tile in the morning and grouted the back wall after dinner.  Before heading home on Sunday morning, we were able to quick get the rest of the grout done.  This shower surround went up about a hundred times better/easier than the last one.  We got our groove going, had a babysitter, and used a much more powerful tile saw.  We were also strategic in our tile selection and used the "better" thin-set.
 A few more pictures for fun!


 I'm the official cutter, while Brian is the mudder.  We work together more on grout, but he applies and I'm the wiper.  This time the grout wiping was really easy (shh, don't tell!), I just wiped my sponge over the tiles and had a nearly perfect line.
She's looking good!  Noah has now seen the tile and he says he prefers the other bathroom, which is good because we call it his!  He's not down with my modern vertical tile mosaic.  That's okay, he also wishes for blue carpet in his room!

Happy New Year!

Sunday, December 29, 2013

Phase 1 complete

An alternative title for this was "Building Furniture with a Lego man".  Noah had an absolute blast putting together the IKEA furniture that we got to finish off "his" room at the Superior Condo.  Warning, we work in a very cluttered and full space!  We're in the middle of phase 2, so we're short a bedroom and worked right in the living/dining area for building.


In addition to putting the furniture together, we had a few other things that needed to happen.  We go this lamp from the neighbors when they came on their "purge and paint" trip.  I had mentioned we were going with more of a coastal look than northwoods forest.  We liked everything about the lamp except the fringe.  I cut it off.
 Take your time and cut very close to the shade.
 Almost there.
 Look at that pile of silky fringes.  It's too bad the base doesn't light up somehow too.  It's a nice lamp, though and works well in Noah's room.  You'll see shortly.
There's more building to be done.  We had to make shelves/towel bars for the bathroom.


 There they are, all put up.  The install was kind of a pain in the neck, but it's just what I was looking for.  Now there's a spot for a few of your vanity top items that won't fit on this small sink, and a full rack for extra towels.
 Whew, she's come a long way!

 And now for the bedroom...
We used IKEA Hemnes bedside tables - the little narrow ones.  We've had those lamps floating around here for awhile now, I believe they were from Home Depot.  I like that they are touch-on and have 3 levels of light.
 Photo bomber!  He's got his "ear-mupps" on.
 Here's the little dresser corner with the hand-me-down lamp and a waterfall picture - not local, but an IKEA cheapy.  We want to put as little as possible into the space, just enough to make it functional and pretty.  Noah always makes it more homey when we come by leaving his buddies or cute stuff on the shelves.
 He wasn't happy about how I selected to put the lamps and kleenex box on the bedside tables...  He wanted his "rock collection" rock in just the right place.

 And here's an outside view.  The most calming thing you could look at - big lake and a few trees.

 Back to the bathroom. The shower tile with glass stripe.  Come back soon, we'll have another fun bathroom tile job posted soon.
 I had to stand in the shower to get this shot :)  And, by the way, the tan towels aren't staying, they're what we had to put on the shelf for now.  I'm thinking about getting a bulk of white towels for the place.
Thanks for visiting!  What do you think?!

Saturday, November 16, 2013

Putting together a gallery wall

After 3 months of staring at this blank wall and the pile of frames and pictures on the floor nearby, I put the little one to bed early and got my gallery on.  Actually, the fact that Brian had finished painting was part of the deal, we had some stuff on the walls, then he took it down to patch them all up (they were in pretty random spots for the size art we bring to the place) and give it a fresh coat of paint because this was the only room in the house that was not "freshly painted" when we moved in.  Freshly painted gets quotes - that's another story.  There is painted trim throughout the house, except in this room.  The estate had all the walls painted, but not the trim, and the trim is pretty rough looking.  We'll get working on that one of theses days.  Gotta decided where to start and what colors to use.  Don't want to paint anything that's getting dramatically changed sooner than later...
Back to my gallery wall.
Before, big empty wall above the desk.

Layout testing on the floor, quick paper cutout to model the light.

It's up!  I've missed having my clock on the wall.

Figuring out the mantle next door, progress.


The whole corner is looking better, still has a ways to go.
I have ideas about that weird TV hole on the left side of this picture.  I want to get a giant, light colored canvas print (DIY art?) to put over that opening.  I want to do some work to lighten up the feel with all that dark wood, without touching the dark wood.  I think it's darker in these pictures since I was doing this work (and photos) late at night, the wood feels a little brighter than this in real life.
We stuck with white paint for these upper walls because of the dark wood.  We want to keep it light with all the dark wood and few windows.  This room is "done" for now.  We've updated the light fixtures, changed out the door knobs, added the carpet, hung some pictures...  Feeling pretty good about this one.
I considered putting pictures on walls in several other rooms, but found that to be very challenging due to really hard plaster.  Any suggestions??  That plaster is hard stuff - I bent a nail trying to get a picture hung in Noah's room...